HTTPS for localhost development environment
HTTPS Certificate – Do you wish to become a certificate authority (CA) like Let’s Encrypt, Verisign etc.. Issue yourself certificates for localhost development domains!
HTTPS or SSL Certificate – Many blogs advise you on how to create your SSL certificate. The advice became outdated when Chrome fixed this — “Support for commonName matching in certificates”.
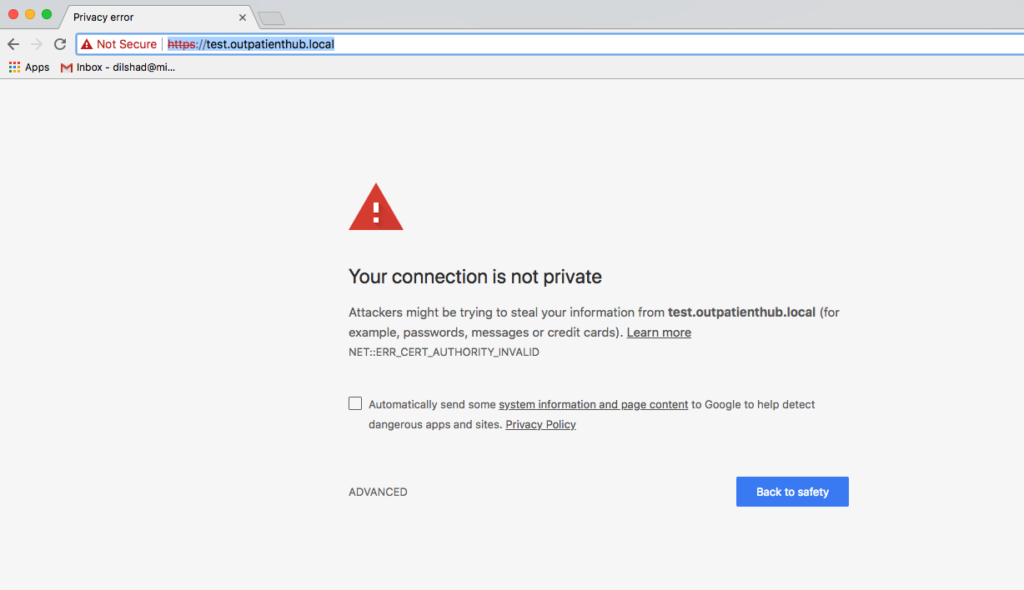
So, the problem arises of how to remove the “your connection is not private” error in the browser when you visit a localhost domain?
How to become a Certificate Authority in 3 steps?
What we are going to do is that we will make a rootSSL certificate that will be used to sign any number of certificates for any number of localhost domains. So open your terminal and follow these easy 3 steps to get started.
1. To create a private key rootSSL.key
The command-line instruction for this is given below and give the passphrase when asked for.
openssl genrsa -des3 -out rootSSL.key 2048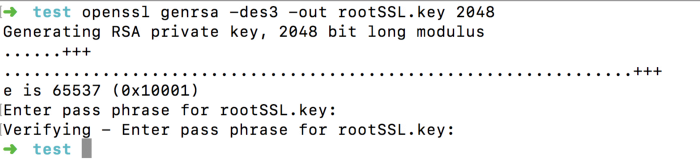
2. To create certificate rootSSL.pem file using private key rootSSL.key
The default validity is 1024 days which can be set to any number of days according to the requirement. You will be prompted and asked a number of questions which you need to answer as shown in the screenshot below.
openssl req -x509 -new -nodes -key rootSSL.key -sha256 -days 1024 -out rootSSL.pem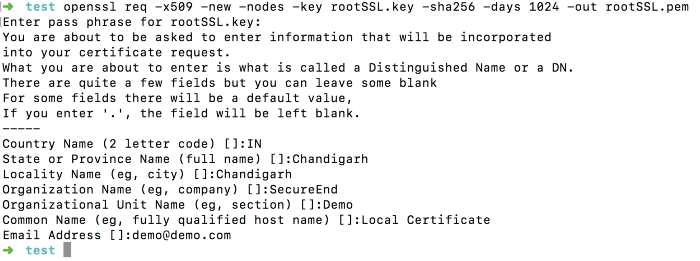
3. To trust the Certificate Authority CA on your local development machine
For Mac / Windows / Ubuntu
Steps for Mac
1. Open the Key chain App
2. Go to File > Import Items and select rootSSL.pem file to key chain and you will see it like this.
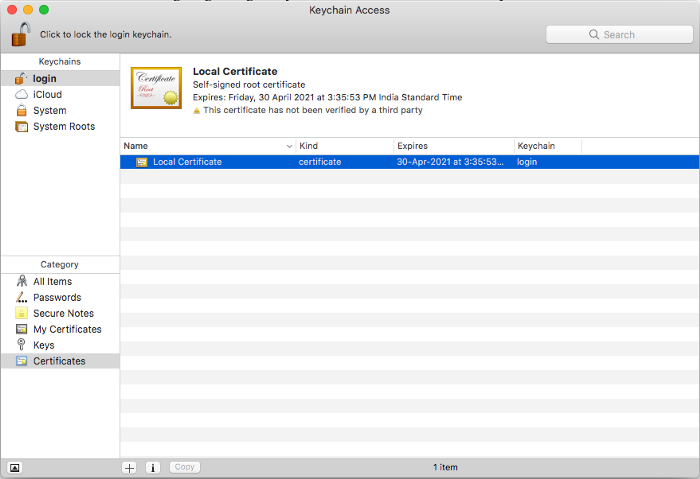
Trust the RootSSL on Mac
3. Double Click on the imported file and go to the trust section and change “When using this certificate:” choose Trust Always.
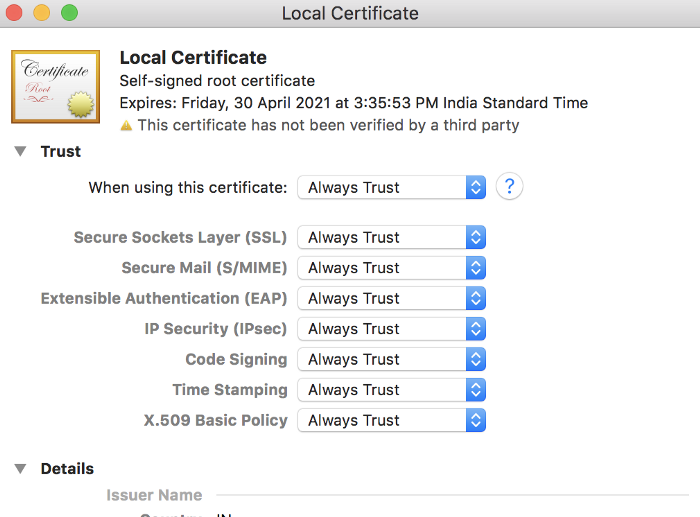
Trust the Root SSL certificate on Mac
Steps for Linux (Debian/Ubuntu)
To install root SSL certificate in Ubuntu, open your terminal and give the following commands.
sudo mkdir /usr/local/share/ca-certificates/extra
sudo cp rootSSL.pem \ /usr/local/share/ca-certificates/extra/rootSSL.crt
sudo update-ca-certificates
Trust the Root SSL Certificate on Debian / Ubuntu
Steps for Windows 10
To install the root SSL certificate in windows 10, use the Microsoft Management Console(MMC). Follow these steps:
Step 1: Select and click on Start > Run
Step 2: Type MMC to open the Microsoft Management Console.
Step3: Go to the File > Add/Remove Snap-in
Step 4: Click on Certificates, and select Add
Step 5: Select the Computer Account, and click on Next
Step 6: Select the Local Computer and click on Finish
Step 7: Click the OK to go back to the main MMC console window.
Step 8: Double-click the Certificates (local computer)to expand its view.
Step 9: Right-click the Certificates under Trusted Root Certification Authorities and select All Tasks and then Import
Step 10: Complete the wizard to import the chain certificate. Browse to locate the chain certificate to be imported or rootSSL.pem file to import
Step 11: Select the Place all certificates in the following store and select the Trusted Root Certification Authorities store. Click on Next and then click Finish to complete the wizard.
You will get the message “import was successful”. You can locate your installed certificate authority in certificate pane.
Now you have become a trusted Certificate Authority on your development machine. Follow Step 3 on as many machines/servers that you need to. It’s a one time work for the next 1024 days!
Issue HTTPS or SSL Certificate for a local Domain in 2 steps.
Let’s assume that your local domain is “demo.local” so let’s go ahead and issue your first SSL certificate!
1. To create a private key demo.local.key
👉 NOTE WINDOWS USERS
. Replace\
with^
for multi line support in cmd.exe shell
openssl req \
-new -sha256 -nodes \
-out demo.local.csr \
-newkey rsa:2048 -keyout demo.local.key \
-subj "/C=IN/ST=State/L=City/O=Organization/OU=OrganizationUnit/CN=demo/[email protected]"
2. To create a new certificate using rootSSL certificate
👉NOTE FOR WINDOWS USERS
. Replace\
with^
for multi line support in cmd.exe shell
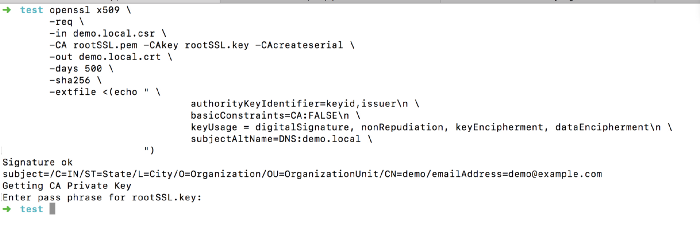
openssl x509 \
-req \
-in demo.local.csr \
-CA rootSSL.pem -CAkey rootSSL.key -CAcreateserial \
-out demo.local.crt \
-days 500 \
-sha256 \
-extfile <(echo " \
		authorityKeyIdentifier=keyid,issuer\n \
		basicConstraints=CA:FALSE\n \
		keyUsage = digitalSignature, nonRepudiation,
		keyEncipherment, dataEncipherment\n \	subjectAltName=DNS:demo.local \
")
Final step — Use your HTTPS SSL certificate at the server
Finally, you have to secure your localhost domain for which the certificate has been created. This will depend on the Webserver that you are using. But basically, it means copying the demo.local.crt and demo.local.key where your server can use them.
- For example, for Nginx, edit the virtual host file.
- For
demo.localand add the following:
ssl  on;
ssl_certificate    /etc/nginx/ssl/demo.local.crt;
ssl_certificate_key /etc/nginx/ssl/demo.local.key;- Or For NodeJS HTTPs Server
const https = require("https");
const fs = require("fs");const options = {
 hostname: "demo.local",
 key: fs.readFileSync("demo.local.key"),
 cert: fs.readFileSync("demo.local.crt")
};

https
	.createServer(options, (req, res) => {
	 res.writeHead(200);
 	res.end("hello world\n");
})
.listen(8888);
Restart the server and hit the domain. All should be green & good now.
If you need any help in setting this up drop me a message.
If you enjoyed this post, don’t forget to like and follow us for more interesting articles.
References:
You may also like to read about Understanding Admin Dashboards Using BI or Medium Blog
- HTTPS for localhost development environment - July 25, 2018


Pingback: Understanding Admin Dashboards - Using BI - TECHBUZMAG